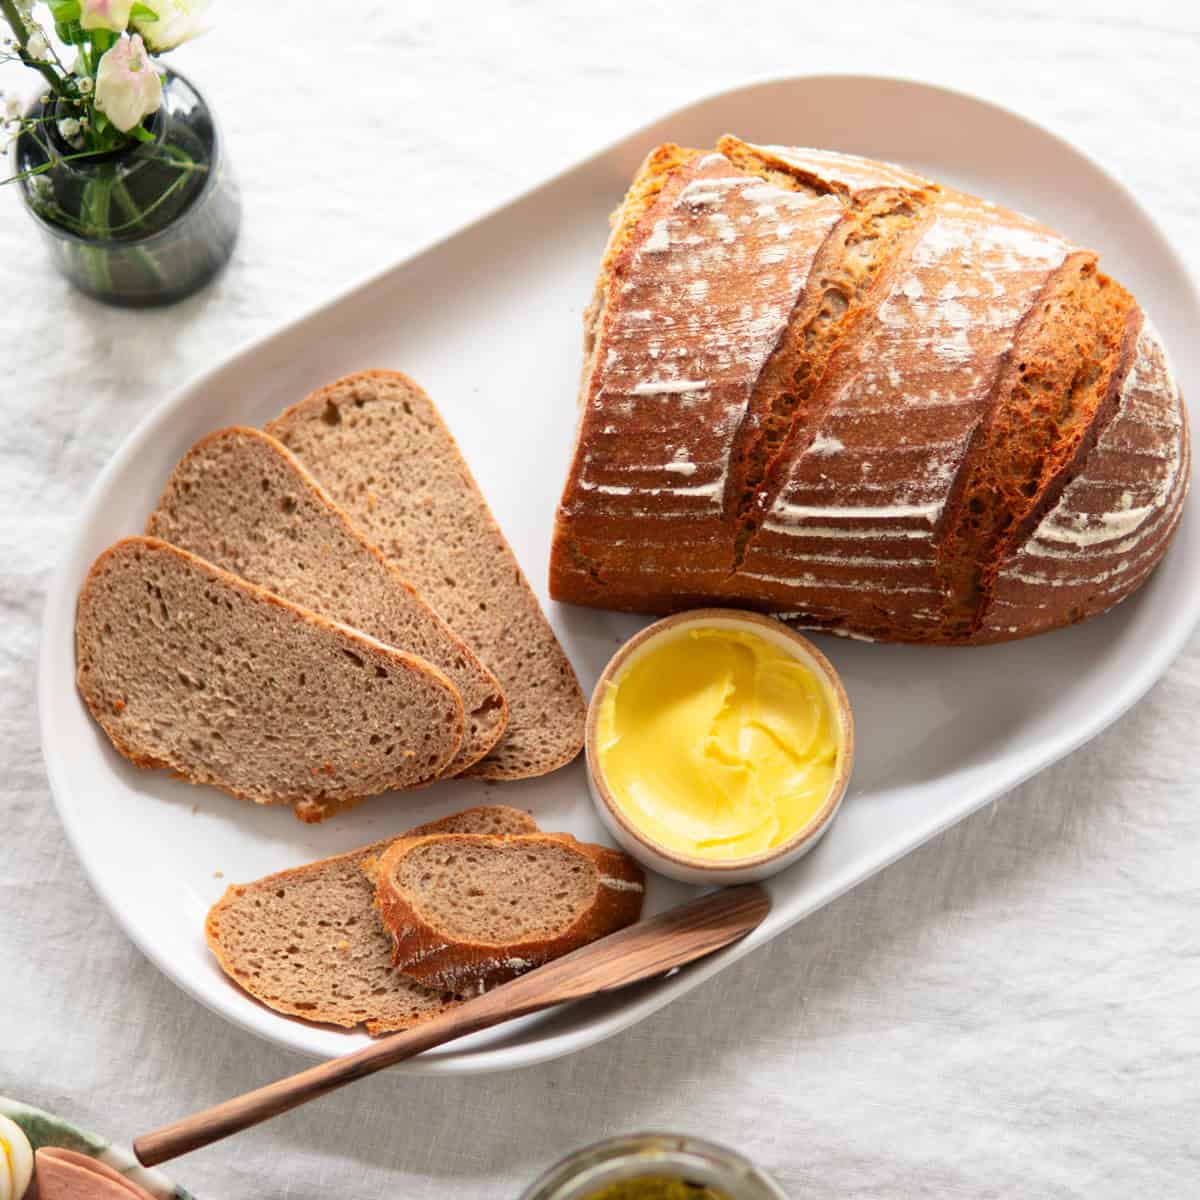
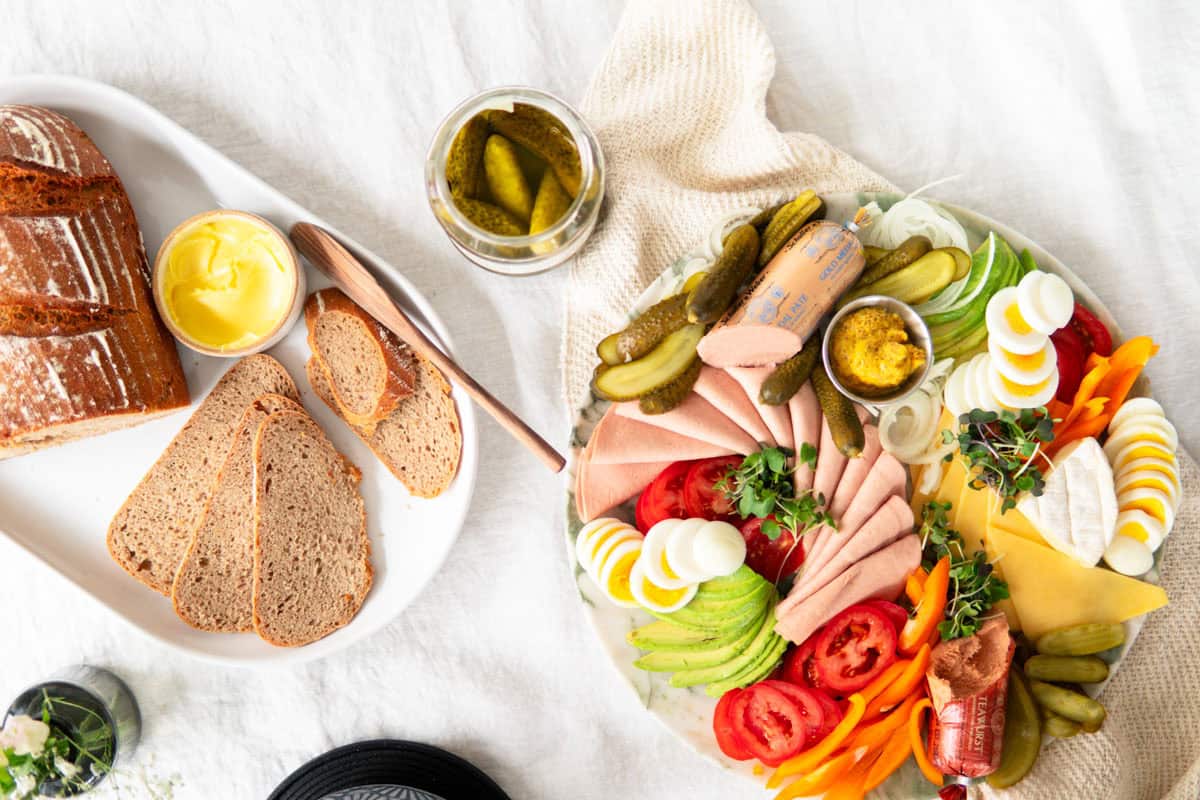
This is my go-to sourdough bread recipe using a combination of wheat and rye flour. It’s a German bread recipe just like from a German bakery, except better. Perfectly crusty on the outside and airy on the inside, making this loaf is beginner-friendly with easy-to-follow steps. Adding sautéed onions is taking it to the next level! This bread is perfect for an authentic German Abendbrot experience.
Jump to:
Why this is the best homemade sourdough bread recipe
This German sourdough bread recipe is just too easy and good to not put on the top of your bread-baking list! As a German, you know I like my bread. There are about 3200 registered varieties of bread that exist in Germany! There is nothing like visiting a German bakery to pick up freshly baked rolls (Brötchen) and bread (Brot). And since there aren't many amazing artisan-style bakeries left in Germany (much has been commercialized), this bread recipe is EVEN BETTER than bread you can buy at most German bakeries.
This rye and wheat sourdough bread recipe (Roggenmischbrot in German) convinces with incredible depth of flavor achieved by combining a preferment dough that you make the day before with a sponge dough and then the final ingredients. When I tell you it's simple and worth it, believe me!
For a fun twist, add sauteed onions when kneading the final dough! It's heavenly! The smells from your oven are pure happiness inducers and that crackly crust and airy interior make my heart sing! And I am sure it will be yours, too!
How to make it
Making sourdough bread is so simple! It all starts with the starter (no pun intended). If you don't already have a starter going, you can buy a dried starter online. Now you're ready to bake! To achieve the full depth of flavor for this rustic loaf of sourdough bread, there are a couple of simple steps you need to follow.
You will make a preferment the night before baking, then another simple water and flour sponge shortly before combining all other dough ingredients to make your final dough. At this point, you can optionally add onions sauteed in butter, which would be called a Zwiebelbrot in German! I promise you won't regret this option.

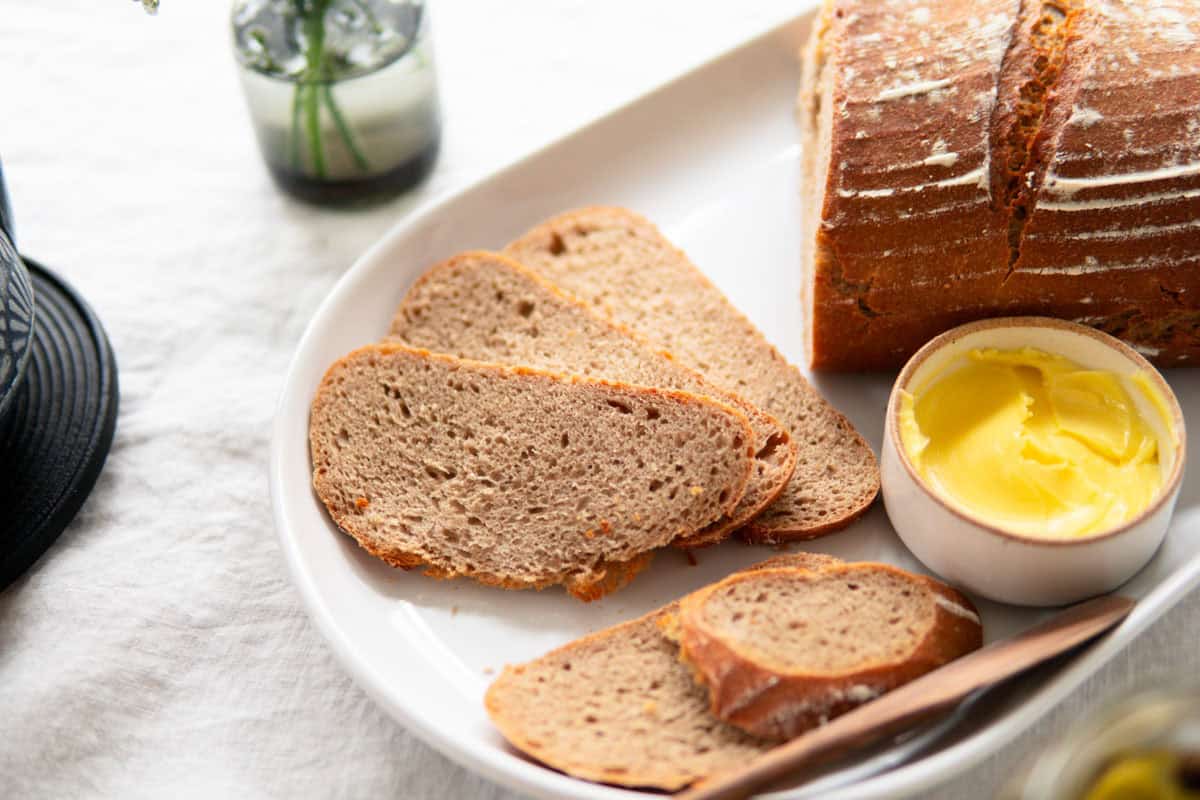
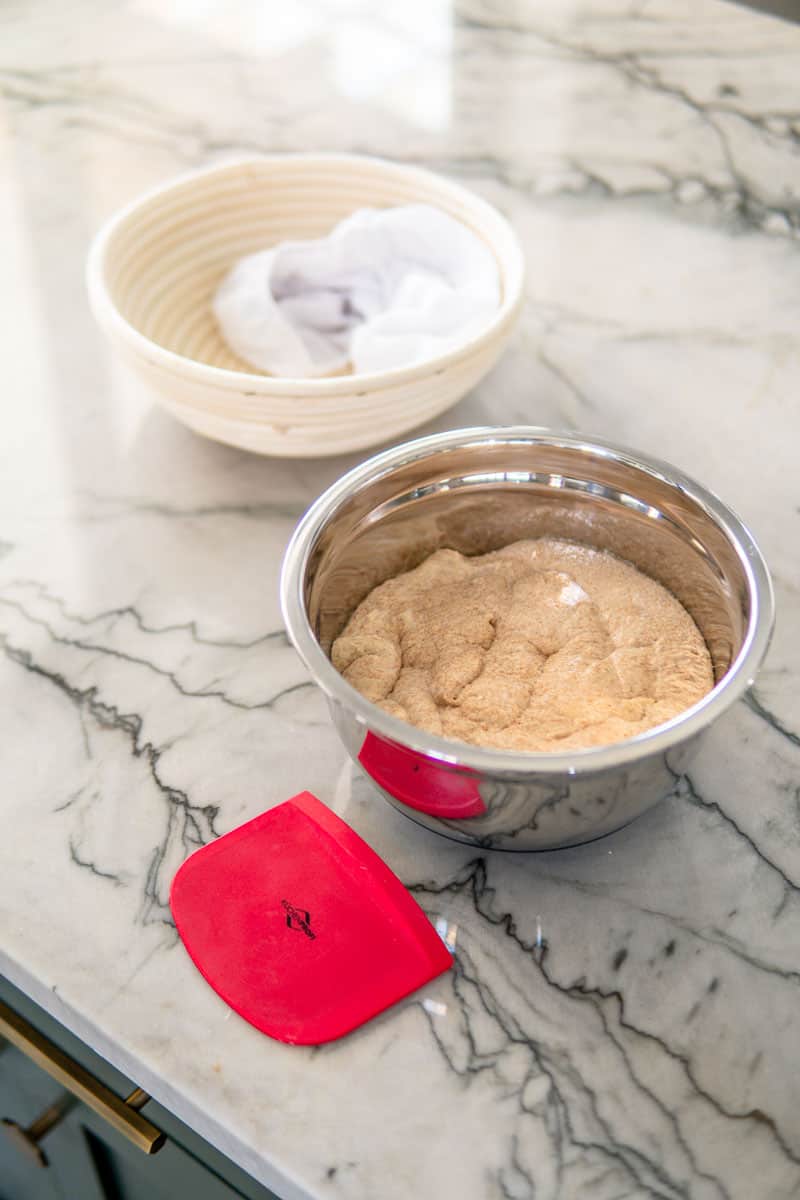
I doubled the recipe, then added onions to one of my loaves (because who loves onion bread with butter and jam?!). You'll then let the dough rise before shaping it into either a boule (round) or a batard (long) shape. It then rests (this is called proofing) in its beautiful Brotform (a German proofing basket), giving it those characteristic lines that I love so much.
The final step is baking. I simply bake it on a baking sheet prepped with parchment paper in a preheated oven with LOTS of steam. You will create steam by adding a casserole dish filled with hot water to the bottom of the oven. And there you have it! A perfect loaf of sourdough bread just like from a German bakery (except I think better).
Ingredients
Making sourdough bread is not rocket science. Here are the ingredients you need to make my rye and wheat version.
Sourdough Starter. You will use either a wheat or a rye starter for this recipe (40 grams per loaf). If you don't already have an established sourdough starter, you can buy a dried starter online to mix with water (make sure to use filtered water). However, if you do want to make your starter, it's not hard! It just takes some time.
Dark Rye Flour. The most important part to note is that this has to be 100 percent whole rye flour, including the entire grain (not all flours labeled 'dark' rye flours have this). I like buying my rye flour in bulk because I bake a lot and this makes it more cost-effective for me. I then keep it in our second fridge downstairs to make it last longer. For smaller quantities, I like using this dark rye flour.
All Purpose White Wheat Flour. I go through a lot of flour with all of my baking. I also buy this flour in bulk and always prefer organic.
Yeast. Active-dry yeast is what I use for all of my yeast-based baking. You won't need much of it for this recipe, only 3 grams per loaf. Make sure you keep your yeast in the fridge, so it lasts longer.
Water. I use filtered water for all of my bread recipes. Sourdough can be sensitive since its a live culture.
Salt. I use pink himalayan sea salt for all of my baking and cooking. I like it for its higher mineral content.
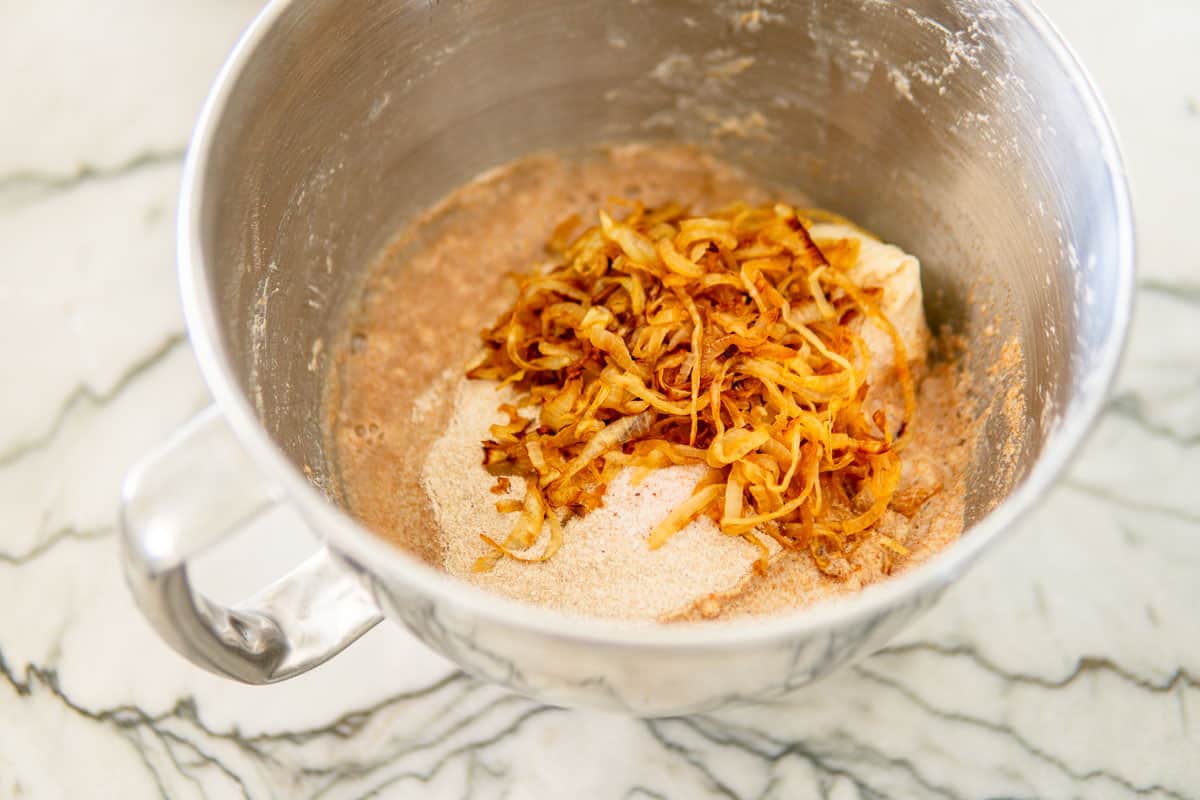
You can also optionally add an onion sauteed in butter when mixing your final dough. Believe me, it's amazing! I use a large, yellow onion.
Tools
Bread proofing basket 'Brotform'. I went through many of these Brotform proofing baskets, and I love these beautiful and sturdy baskets by the Frieling brand. You can either use a round (boule) bread (I have the 10-inch one with liner) or a long (batard) basket (one size).
Set of mixing bowls. These German Küchenprofi mixing bowls are great (available at Frieling). They include measurements on the inside and are made from heavy-duty steel. They also have a rubber bottom, so nothing slides around when mixing.
Dough Tools. This set of dough tools is super nice to have for removing sticky dough easily from bowls, cleaning your counter, and cutting dough. I use mine all the time and they're made by the German brand Küchenprofi (available at Frieling).
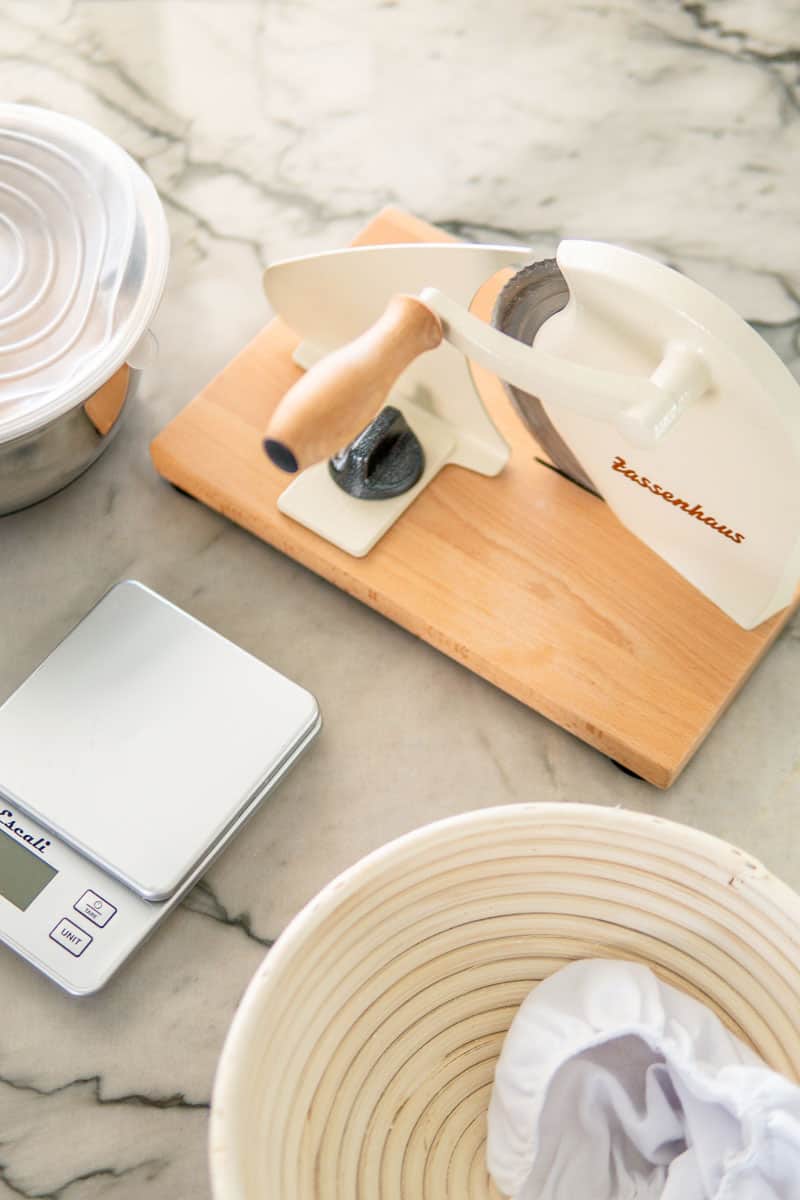
Bread Slicer. Every household in Germany has one. I love that this slicer by the German brand Zassenhaus (available at Frieling) does not rely on electricity, has rubber feet to attach, so it won't wiggle, and you can adjust the thickness of the slices. It's also beautiful, has heirloom qualities, and would make a great gift for those lovely bakers in your life.
Kitchen Scale. Please weigh your bread ingredients. It makes everything easier and your results better! This kitchen scale weighs precisely 1/10 of a gram, which comes in super handy when weighing small amounts of ingredients (such as 3 grams of yeast for this bread recipe).
Video
To make your life easier, I recorded this short 1:19 video of me making this bread. I hope this helps you to see how easy it is to make German bread at home.
More German baking recipes
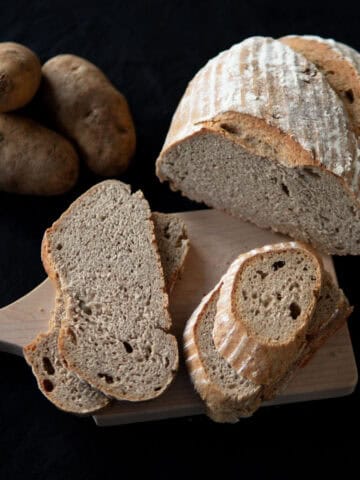
In the mood for more German baking recipes? Then try out my potato sourdough rye bread recipe (Karoffelbrot) sunflower seed rolls (Sonnenblumenkernbrötchen), German wheat rolls (Weizenbrötchen), or this fun pretzel beer bubble bread.
Do you need some help baking with sourdough? Download my free sourdough tips sheet here.

German Sourdough Bread Recipe (With Rye)
Equipment
- 1 proofing basket batard (long loaf) I went through many of these Brotform proofing baskets, and I love these baskets by the Frieling brand
- 1 proofing basket boule (round loaf) use either a batard or a boule shape
- 1 set of mixing bowls These mixing bowls are great. They include measurements on the inside, are heavy-duty, and have a rubber bottom, so nothing slides around when mixing.
- 1 dough tools This set of dough tools is super nice to have for removing sticky dough easily from bowls, cleaning your counter and cutting dough. I use mine all the time!
- 1 bread slicer Every household in Germany has one. I love that this slicer does not rely on electricity, has rubber feet to attach, so it won't wiggle, and you can adjust the thickness of the slices. This would also make a great gift for those lovely bakers in your life.
- 1 Kitchen Scale Please weigh your ingredients. It makes everything easier and your results better!
- 1 Dutch Oven I love this durable and beautiful Dutch oven that's by a Zwilling partner brand. Baking in a Dutch oven gives you reliable results without having to add steam to your oven (view instructions in the notes section below).
Ingredients
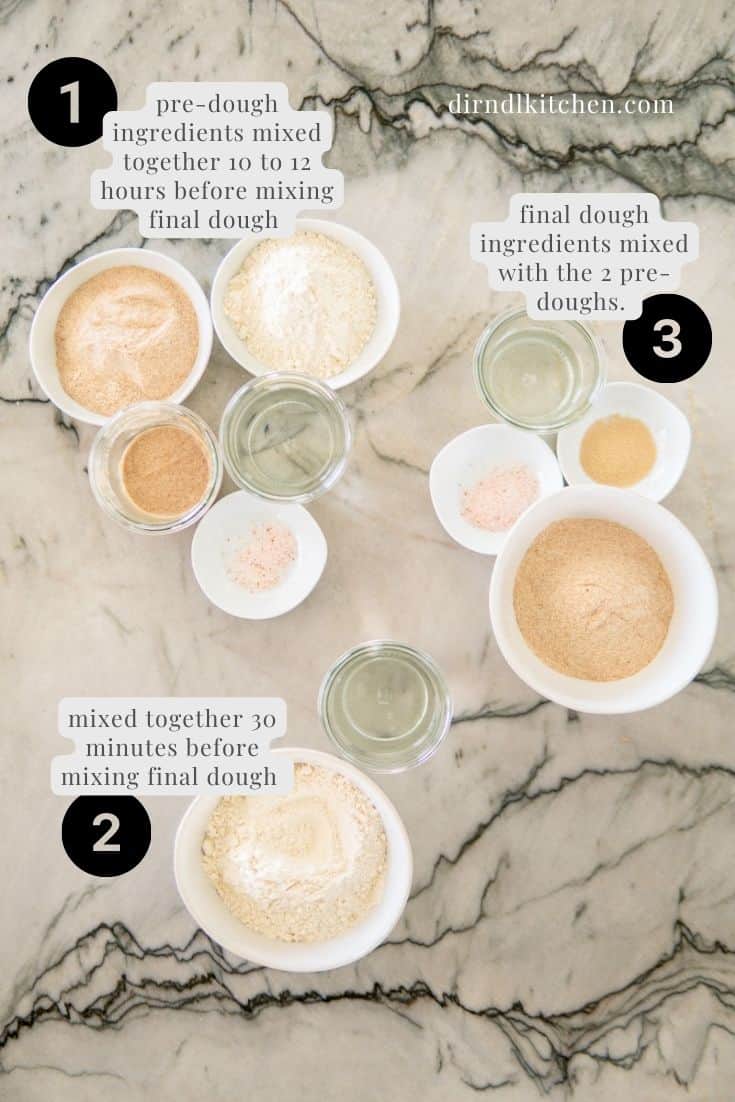
Preferment (made 10 to 12 hours before mixing final dough)
- 4 grams salt
- 195 grams water Luke warm, I use filtered water.
- 90 grams dark rye flour I also buy rye flour in bulk because I bake so much. Make sure it's 100% whole grain.
- 100 grams all-purpose flour white wheat flour
- 40 grams sourdough starter either rye or wheat
Sponge (made 30 minutes before mixing final dough)
- 200 grams water Luke warm, I use filtered water.
- 260 grams all-purpose flour white wheat flour
Main Dough (do NOT premix, just combine ingredients with 2 pre-doughs)
- 70 grams water Luke warm, I use filtered water.
- 9 grams salt
- 175 grams dark rye flour I also buy rye flour in bulk because I bake so much. Make sure it's 100% whole grain.
- 3 grams active dry yeast ½ pouch. I keep mine in the fridge, so it lasts longer.
Zwiebelbrot (onion bread)
- 1 yellow onion large
- 14 grams butter
Instructions
Make Preferment
- In a medium-sized bowl, combine all preferment ingredients using a rubber spatula or a spoon. Cover air-tight and let rest at room temperature for 10 to 12 hours.4 grams salt, 195 grams water, 90 grams dark rye flour, 100 grams all-purpose flour, 40 grams sourdough starter
Make Sponge
- In a small bowl, combine ingredients by hand until you have a smooth dough. Cover airtight and let rest at room temperature for 30 minutes.200 grams water, 260 grams all-purpose flour
- If adding onion, trim, peel and slice the onion and cook on medium-low heat with the butter for about 10 to 15 minutes or until browned.1 yellow onion, 14 grams butter
Make Main Dough
- DO NOT combine the ingredients for the main dough, instead just add them to the 2 pre-doughs (optionally add cooked onion now).70 grams water, 9 grams salt, 175 grams dark rye flour, 3 grams active dry yeast
- Knead by hand or using the dough hook of a mixer until you have a homogenous, barely sticky dough and all ingredients are worked in (about 5 minutes).
- Cover airtight and let rest at room temperature for 1 hour. The dough should have increased by about half of its size.
- Shape the dough into either a round or a long shape, depending on the shape of your basket (I personally prefer the longer shape usually because I like smaller, more even slices). You can watch my video to help you understand the shaping process. Generally speaking, you will fold the top of your dough over to the bottom, then press down. Repeat from all sides and work all 'flaps' into the middle.
- Prep a proofing basket (Brotform) with white flour (I don't use the liner), then add the shaped loaf seam side down. Cover with a linen towel or the liner of the basket, and let proof (final rise period) at room temperature for 45 minutes.
- Preheat your oven to 250° Celsius (480° Fahrenheit) and add a casserole dish filled with hot water to the bottom of your oven.
- Prep a baking sheet with parchment paper, then flip your dough onto it. Check to make sure there is still plenty of water in your casserole dish. Transfer quickly to the hot, steamy oven and bake for a total of 60 minutes (reduce the temperature to 220° C/ 430° F 10 minutes into baking).
Video
Notes
- Do not add the dish filled with water to create steam in your oven. When adding the lid to your Dutch Oven, the moisture in the loaf will steam itself.
- Preheat your Dutch Oven with the lid on.
- Remove the lid, place the dough onto parchment paper in the Dutch oven and score the top of the loaf. Replace the lid. Bake for 10 minutes at 250° Celsius (480° Fahrenheit), then reduce the temperature to 220° C/ 430° F and bake for 40 more minutes. Remove the lid of the Dutch Oven and bake your loaf for another 10 minutes. This will help to brown the surface.




Evelyn Dunshee
Why is the dough so stiff. I could hardly knead it.
dirndlkitchen
Sometimes the different types of flour make a difference in absorbing more water. Did you have trouble with mixing the final dough?
lothar barth
Re:Sponge making.
after making sponge and let it rest for 15 min.it is hard to mix same into main dough,
please let me know.
dirndlkitchen
Did you cover yours while letting it rest? I may change the recipe to add less water into the final dough and more into the sponge.
John Corkery
Excellent results. The only problem with making the first loaf as a test is that I was immediately asked to make two more. One thing I did was that we reduce the baking time from 60 to 50 minutes as the loaf appeared to be done. This is probably due to either a difference in the efficiencies of ovens, ours may run hot, or differences in elevation.
dirndlkitchen
I am so happy you love this sourdough bread recipe!! I am glad you checked your loaf early on. I like mine a little darker. Did yours have a lighter crust?
John Corkery
It did have a lighter crust than later versions which we ran for the full sixty minutes. It still tasted great.
dirndlkitchen
Thank you for the feedback!
Kris
Beautiful bread. Wish I could post a picture it is so pretty. I followed this recipe exactly, except for the temperature. Because I live at a high altitude, I adjusted it to 450F then dropped it to 430F. After cooking it was 205F.
dirndlkitchen
I am so so happy you love this bread recipe as much as I do!! No better compliment! And if you're on Instagram or Facebook, please send a picture there!
Beverlie
I am mystified. I've made it twice, followed it faithfully and it was so extremely wet that I had to add an additional 1 1/2 cups white flour to even remotely resemble "barely sticky." I'm guessing the difference between bread flour and all purpose is the culprit, as I'm using bread flour. I will try it one more time.
dirndlkitchen
I am not sure what's going on because I have literally just made it. Are you talking about the final dough or one of the pre-doughs? What are the other flours you are using besides bread flour? I honestly think the bread flour should not make too much of a difference in this recipe (compared to all purpose flour).
Beverlie
Hi again, I've been using my own starter which is 100% hydration, so I cut back on the water for the main dough. That was the culprit! Still a nice recipe. I've tried others and I keep coming back to yours. :-). This sourdough adventure certainly has a learning curve!
dirndlkitchen
I am so glad you figured it out and that you have come back even after going through your challenges! I love this sourdough bread recipe so much! Have you tried my potato sourdough bread yet?
Daniela Scholz
Hi! Finally getting around to trying this bread! Made the preferment dough last night, made the sponge this morning and just now added the last ingredients to the two doughs and used the bread hook attachment for 5 minutes. It’s super sticky. I added a bit of flour but that didn’t do much! Any ideas? What could be wrong?
dirndlkitchen
I am not sure what could have gone wrong. It's possible that the rye flour you used does not have as much of the germ in it, so it absorbed less water. Which brand do you use?
Daniela Scholz
Update! I made the bread that day- even with the stickier dough and it came out beautifully! I use BobsRed milk flour- wonder if that’s it? Either way- turned out great!! Thank you!
Luke
I made a couple of loaves and everyone loved it....thanks. For my next loaves can I make the main dough the night before and store in the fridge so I can bake earlier the next day? If this can work should I put it in fridge for first (air tight container) or second rise (proofing basket)? Thanks for a fun recipe and great bread.
dirndlkitchen
I am so happy you love my rye bread! I always bake two loaves, then freeze one immediately to enjoy later. You could do the same and simply let it sit out at room temp (still covered) overnight to enjoy the next morning. I would not let it sit in the proofing basket in your fridge because the condensation can cause the dough to start sticking to the basket and they are a bit harder to clean. I would instead try to have the final proofing be in a steel bowl dusted with flour. Turn upside down on a baking sheet prepped with parchment paper the next morning and brush off any excess flour before baking. I hope this helps and I will have to try this myself sometime.
dirndlkitchen
Or you could use the proofing basket liner or line the basked with a linen towel instead. I would be a bit worried that the dough dries out on top, so maybe cover the top of the basket in some way to make it more airtight. You'll have to let me know how it goes!!
Simone
Delicious bread. Very wet dough that was more mixed around by hand than kneaded, but I kept it wet not adding more flour. Turned out beautifully with Dutch oven baking method. Still not exactly the German bread of my childhood (which must be 100% rye?), but I’ll make this and keep looking.
dirndlkitchen
Hi Simone! If you can get your hands on white rye flour, you could use it instead of the white wheat flour in the recipe for an even more pronounced rye flavor. Also, using truly whole grain rye flour (with germ and bran attached) should bring more flavor. The best way to know is to send a message to the mill OR to mill your own flour. I hope this helps! Sophie
Massachusetts Baker
My current favorite German rye bread recipe, and I do like that it is less holey than it seems so many recipes online and thus more authentic as a German bread. One change is that I halve the yeast because I want to make sure the sourdough is more prominent - I don't think the taste is different, though. Also, when baking, I use a Dutch oven and heat it with the stove, then use the lid to allow moisture instead of using added water, and finally removing the lid for the rest of the bake. This is something I learned from the Tartine Bakery book.
dirndlkitchen
Thanks so much for your lovely review!! You could probably leave the yeast out entirely if your starter is strong and you're baking in warmer climate. It definitely helps a bit in the winter months. And thank you for your Dutch oven notes. I have a steam oven I bake it, but have also recently tried my recipe in a Dutch oven just to share my experience. And I have really liked the results!
Marina
I just made this loaf yesterday. Easy to follow instructions and good results. I used the Dutch oven method for baking, reduced the baking time by 10 minutes and the temperature to 450˚F at the start and then 425˚F. Next time I may reduce the total baking time by another 5 minutes. The bread turned out great. It looked beautiful, has a nice crumb, and good color. Being a Northern German by birth, the bread wasn't exactly what I remember from my childhood, it reminded me more of mixed rye breads I've tasted in Southern Germany and Austria. I like that it's a versatile bread perfect for any topping…butter with jam, sausage, cheese, etc. I'll definitely make this again.
dirndlkitchen
Hi Marina! Thanks so much for the amazing feedback and the love for my German sourdough rye bread recipe! What were the breads like from your childhood? I'd love some added details, so I can see if I can recreate something closer to what you grew up with! Sophie
Marina
Hi Sophie, I've made at least 6-7 loaves based on your recipe since my initial comment. Each loaf seems to be better than the one before. I'm not sure why, especially since temperatures and humidity levels have varied a lot. Overall, I have noticed that more recently the dough tends to be wetter (probably dependent on humidity levels and perhaps the flour I'm using) but wetter dough makes for easier stretching and folding, so there's that. The dough/final shaped loaf rises beautifully in the Dutch oven and everyone loves the bread. Frankly, I'm not sure I have anything to improve on your original recipe. It's wonderful.
That said, you asked about my northern German bread memories: I think the bread/mixed rye breads I remember from my childhood had a little bit more moisture in them, slightly larger holes, and also a little more tangy flavor. I'll be experimenting with your recipe by adding a higher amount of sourdough starter to see if that will do the trick for me. Stay tuned!
dirndlkitchen
Hallo Marina! Thank you so much for your lovely review! I would also love it if you tried my new potato sourdough rye bread with 100% sourdough starter and no yeast. I think you will love it! Sophie
Oscar
I finally developed my sourdough starter and made it! It was great! Some butter just coming out of oven, and it disappeared! 😋
Sophie Sadler
Oscar, I'm so glad that my German Sourdough Bread recipe was a success! Thank you for your kind comment.
Oscar
What an amazing bread! It was a success. Good french butter, out of oven, and it was gone! Everyone loved it.
Sophie Sadler
Oscar, I am so glad that you had success with my German Sourdough Bread recipe! Thank you for the kind comment.
Jim Feeney
Hi. Recipe looks very interesting and I’m going to have a go. You didn’t detail the onion version but assume you caramelize the onions in butter and cool then add them to your final dough?
dirndlkitchen
Hi Jim! Yes, cook the onion in butter over medium low heat while stirring occasionally and until most of the moisture is cooked out. If they are still too wet, this may change the dough consistency. I hope this is helpful, and I will add this into the recipe notes. Thank you!!
Karen
.
Marina Kanotier
I would like to make sure that the loaf is going in seam side down. I make sourdough weekly and all recipes call for placing it seam side up so it on the bottom once you flip it to parchment. Is there a reason this particular bread goes in seam side down?
dirndlkitchen
Hi Marina! I don't score (cut) this bread before baking, and the seams ending up on the top side in the oven help the bread expand where those seams are. It makes for a great, rustic look. I hope you give it a try! Sophie
Leonard Clark
The amazing thing about this particular recipe is it is very repeatable, with incredibly consistent results each time. I have made this recipe in a number of times and the loaves come are exactly the same each time. The most impressive aspect of this recipe is that the consistency in the rise, the fact that the loaf never collapses during the bake. The crumb is consistent and the crust is exactly what I remember when my Oma made rye bread. The Dutch oven ensures some of the consistency of the loaves each time but this is far and away the best recipe I found. Thank you.
dirndlkitchen
Thank you so much for your incredible review, Leonard! Now that you had success making this bread recipe, I'd love to see what you think about my new sourdough potato bread with rye! Thanks again! Sophie
Colleen
I’ve made this recipe several times and it is delicious!! My husband loves it for sandwiches and with nutella 🙂 . Is there any way that you could repost or email your video of how to shape the dough? It won’t play for some reason. I don’t feel like I know how to do that very well and thunk it may be why my loaves are more flat than I want them. (I use a round loaf). Thanks for everything! Colleen
dirndlkitchen
Hi Colleen! I will see about re-uploading the video to show you how to shape the loaf. I usually shape it as a circle first by pulling the dough over itself and rotating it in a circle. The seams will all end up on one side (I usually have this be the top part of the loaf because I find it easier to work that way). This is all you would need to do to shape a round loaf (boule). For a batard (long loaf) I turn it over and press against the sides until it's the length of my proofing basket. I hope this helps until I can find the video and upload it again. Thanks for being here and for baking my sourdough bread with me! I am so glad you love it! Sophie
Johanna
Easy to make and tastes just like from a German bakery:)
dirndlkitchen
Thank you so much for the amazing feedback for my sourdough rye bread! Means a lot!
Young Liu
Very detailed recipe for the German rye sourdough bread, especially for using only whole wheat flour instead of bread flour in other online recipes. I am preparing to try it tomorrow. A few questions about the recipe:
1. Can I use medium rye flour (whole grain) instead?
2. In your "make main dough" section, should the first thing be putting overnight "prefermented" dough and "sponge" made the next day together followed by adding other ingredients including more water, salt and even more rye flour into the combined dough?
3. You have used "all-purpose flour white wheat flour" in several places. Do you mean "whole wheat flour" that is commonly used term in US?
Thanks.
dirndlkitchen
Hi Young! 1. If using medium rye flour, you may need to add a bit more. The 'dark' rye flour I use contains the whole grain and medium will have parts of the grain removed. OR you could add a little less water to start with.
2. You will add all prepared doughs and the remaining ingredients at once and then knead.
3. It's all purpose flour (white) and I only specify white because you can now buy whole wheat all purpose flour and it's confusing. I wish they had a numbering system in the US like they do in Germany for flour.