Rumtopf is a fun commitment: 6 months of adding this fruit and that fruit to sugar and then soaking it in rum until Christmas time, then enjoying it over ice cream, in champagne and in desserts. Everyone should try it!
Rumtopf
About this Recipe
This Is A Sponsored Post That Contains Affiliate Links
Rumtopf Using STROH
Hey, my name is Sophie and I am new to Rumtopf making. Who else?? Yet somehow I kept having restless thoughts about starting one, and so here it goes, featuring the most iconic rum from Central Europe: STROH. Endless memories of my Oma Sieghilde sneaking a giant shot of STROH rum into waffle batter come to mind. However with Rumtopf, there is nothing sneaky about it. It's a giant, proud pot of rum with fruit infusing in it... and the rum infusing the fruit. And it's delicious! You'll want to stock up on plenty of STROH for your Rumtopf! The hardest part about Rumtopf? The wait until Christmas time, when it's finally time to enjoy it in desserts, over ice cream, in champagne, you name it! I can't wait to share some recipes with you later on!
Check out my addictive, buttery Rumtopf Scones recipe and Rumtopf Ice Cream recipe!
Where did Rumtopf come from?
The first mention of a Rumtopf was in 1885 in the book "Das ABC der Küche' by Hedwig Teyl. It's not totally clear how Rumtopf came to be, but it's said that when traveling across the sea, fruit accidentally fell into a barrel of rum, which not only helped preserve it for the long journey, but also made it taste great! And the Rumtopf was born.
Rumtopf without a Rumtopf
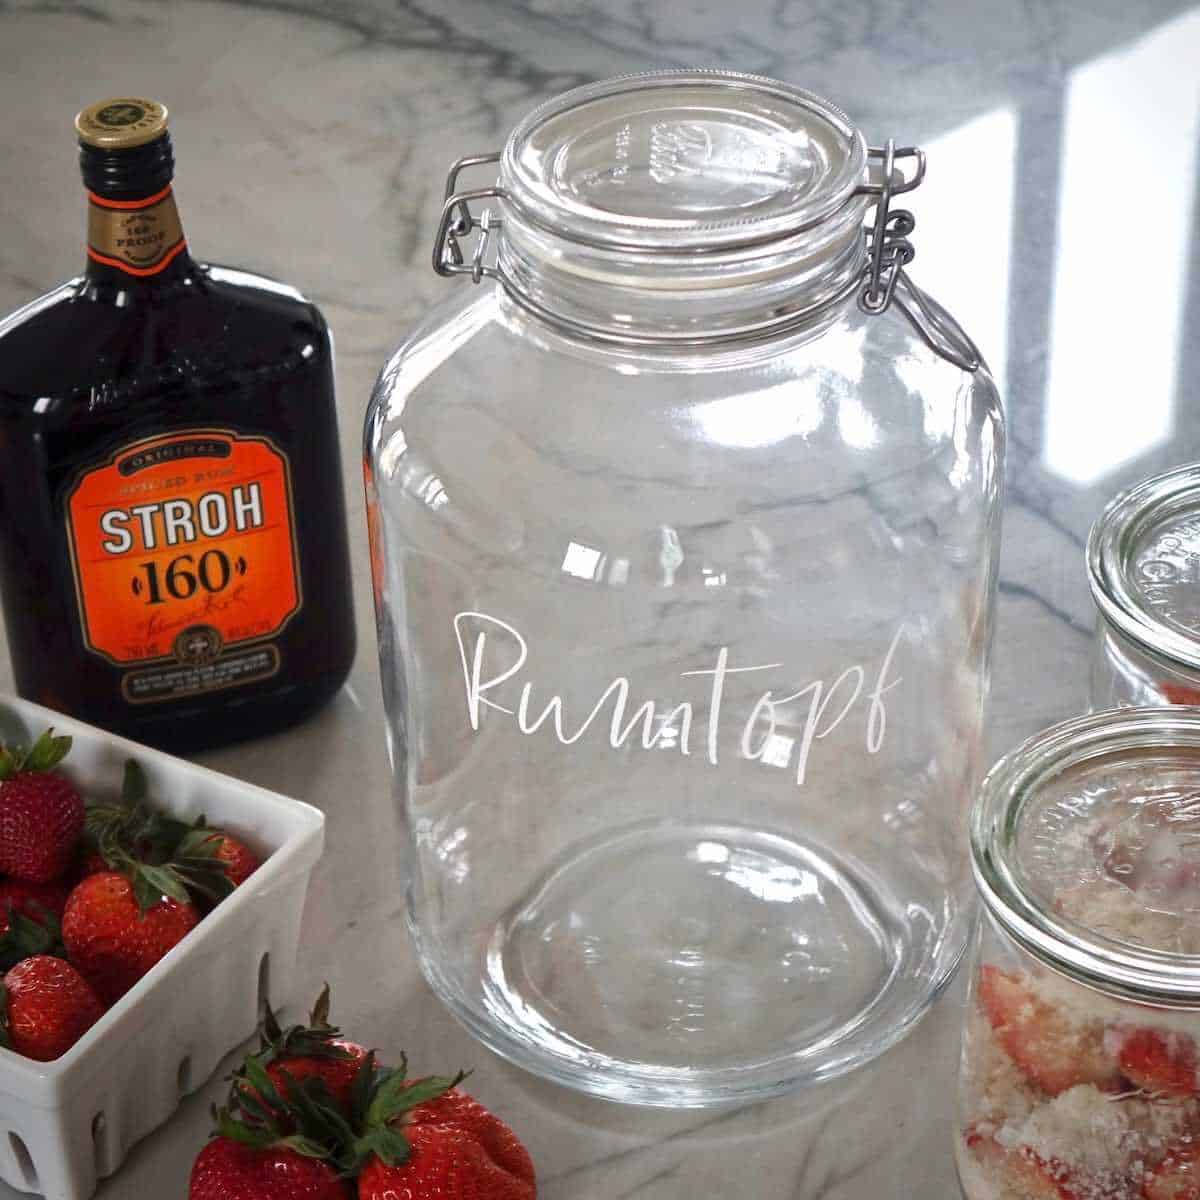
Traditionally Rumtopf is made in a Rumtopf-specific crock like these here and often they have a wide opening and come with a tight-fitting lid and even weights to hold the fruit beneath the surface. I tried importing several Rumtopf crocks (one to keep and several more to sell to you), but apparently they are quite fragile, so they wouldn't ship them (and what's even worse is that sometimes you don't even know your Rumtopf is broken and after using it, it starts leaking! I cried only for a bit until I decided that using a glass jar for Rumtopf instead is really better for a couple of reasons: 1. you can buy the same glass jar very easily yourself and you know when it's broken and 2. I can show you what's going on in my jar! The downsides: It's not dark in the jar (although there are ways to work around that) and the fruit needs a workaround method to stay submerged in the rum (floating fruit means chances they could grow mold, which could then totally ruin your Rumtopf - not cool). It's still my goal to get a Rumtopf pot from Germany eventually, but until then, I will enjoy this pretty glass jar for my Rumtopf!
Let's Start: Time to add Strawberries
It's the beginning of April, so let's start by adding in some strawberries. That's traditionally where things start anyways. Generally speaking, you want to add fruit in the ripest condition, so the flavor will be at its peak as well. You always want to make sure that the fruit is thoroughly rinsed and dried off and that all stems/greenery and seeds are removed (cherries are the exception and can go in the Rumtopf with their stones still in the fruit). Some fruits with thicker peel (like apples, apricots, pears, mango, etc) need peeling as well. Grapes, plums, berries can enter the pot as they are (make sure to still cut up the plums and take the seeds out). Larger fruits always need to be cut up into bite-sized pieces.
Rumtopf Glass Jar Work-Arounds
Back to the strawberries. You will want to start off your Rumtopf by combining the same weight of strawberries and sugar. After the first 'feeding,' we will then cut the sugar in half. The rum always needs to cover the fruit by about an inch or two centimeters. The fruit needs to stay soaked in the rum with no fruit peaking up, so for right now I utilized plastic wrap on the surface to keep my fruit from breathing air. If I figure out a way to do it without putting plastic in the Rumtopf, I will let you know! That being said, if you know of a way to do that, please leave me a comment or send me a message or connect with me on Instagram! Fermentation weights (which are often made from ceramics or glass) don't fit through my jar opening it seems like. You may want to cover the surface from the get-go because it only took less than a day for my fruit to swim to the surface and I am glad I checked on my Rumtopf about once every 10 minutes the first couple of days (it's my baby!!).
Keep it Dark and Cool
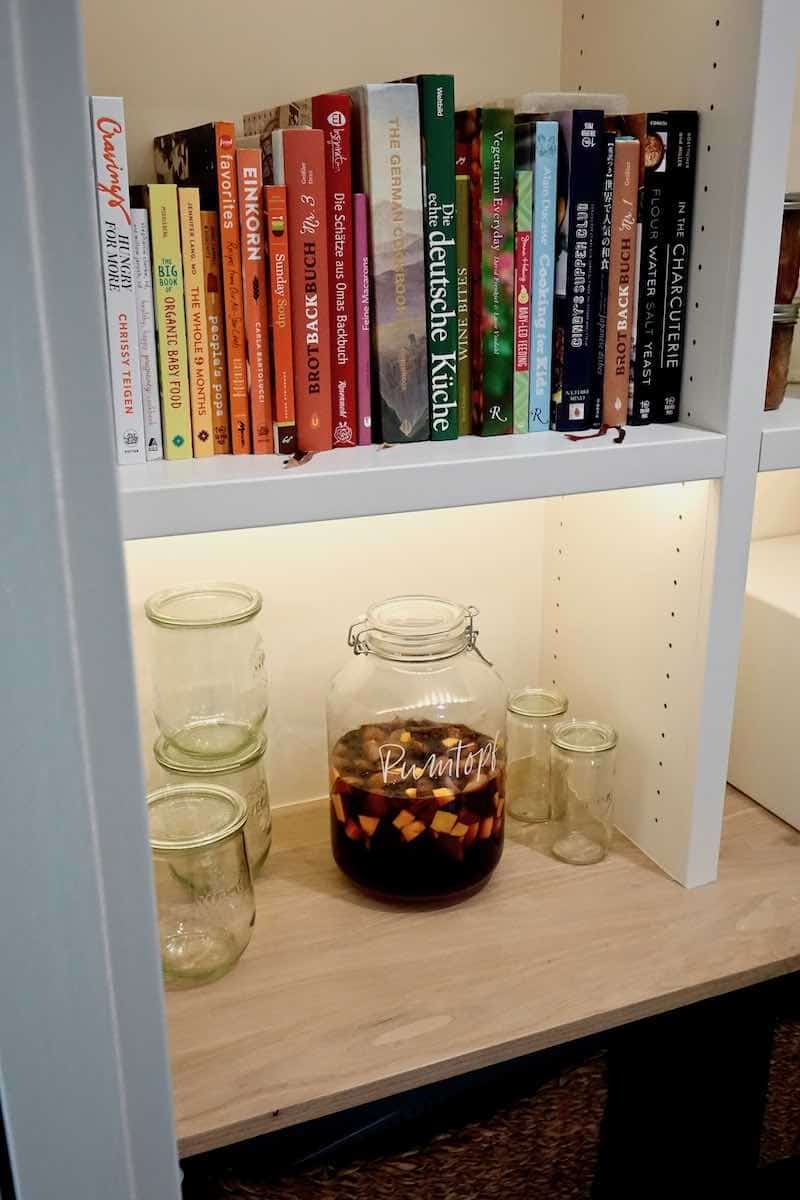
One other thing you'll want to pay attention to is keeping your Rumtopf in a dark place that's also preferably cool, to discourage fermentation. If you have a basement or cellar, that's ideal, but that could be a cabinet or even a closet. Alternatively you could just throw a dark towel or blanket over it to keep it dark inside the jar. I have mine sitting in the pantry, where it's protected from light. I like it there, so I can keep a better eye on it. Once we finish our basement, I will move it down there.
More Rumtopf Posts Coming Soon!
In my next post, aka when I add the next fruit, I will walk you through some troubleshooting tips like what to do when the Rumtopf gets bubbly. Until then, please join me in making a Rumtopf and stay tuned on a fashionable new and hand-printed Rumtopf tee hitting my shop soon. Rumtopf labels like the one on my Rumtopf jar will ship free with each Rumtopf shirt order! If you're making Rumtopf with me, please leave me a comment! I can't wait to connect with you and see how it goes for you!
2nd Month (April): Recap from Last Month
It's the second month for my Rumtopf and I am proud to announce that it's doing well! I'm honestly not trying to scare you here, as there is very little that could actually go wrong. Within a day of adding my strawberries last month, I did have a few swim to the surface. Because my jar's opening is pretty small, I decided to simply cover the surface with plastic wrap and that has worked fine for me. If you happen to use the same jar and have a plastic-free solution, please let me know!
The biggest things again to keep in mind are to:
- Keep it dark. Keep your Rumtopf in a dark space if you're working with a clear glass container like I am.
- Keep it cool. That means room temp is fine, but if you have a cooler spot such as a cooler basement, that would be ideal. I keep mine around the corner in my pantry and I'm not worried about it being too warm.
- Cover the surface. The surface of your Rumtopf contents should be covered. I use plastic wrap for mine. This is to keep fruit from swimming to the surface and potentially spoiling. Replace the plastic wrap every time you add to your Rumtopf to keep things sanitary. I think we all know too well what germs are after this last year!
- Keep an eye on your Rumtopf. If you ever see bubbles developing, this means your Rumtopf is fermenting and that's not what you want. To stop the fermentation, add more 160 proof STROH. Elevating your Rumtopf's alcohol content will stop any fermentation. So always have some STROH on hand in case you need it (that's really some good life advice actually).
- When adding fruit, always add more STROH too. Although I will play with the proportions some for next time, otherwise my jar will be full in no time!
- Use the best fruit. Always make sure the fruit you're adding is ripe, flawless, washed and dried. Better fruit, better Rumtopf.
If you can follow these basic rules, you should have no problem making a pretty amazing Rumtopf at home!
2nd Month (April): Adding Blueberries & Blackberries
Of course you can choose to add whichever fruit you want (scroll on down to my recipe to see which fruits work well), I decided to add a mix of half blackberries and half blueberries to my Rumtopf this month. And because typically Rumtopf is made with roughly 120 proof or 60 percent alcohol rum, I decided to mix the STROH rum, which is 160 proof or 80 percent alcohol, in a 3 to 1 ratio with tart cherry juice this month, which is bringing down the overall alcohol content. I plan to add cherries later this summer, so that's why I decided on cherry juice being a good fit. I also plan to add pineapple later, so I may add pineapple juice next. If you have a juicer, you could also juice the fruit you're adding to mix with STROH. Well, we have a juicer, but I still decided to buy juice instead. 😀 I like the Lakewood organic juices that I can find locally at Whole Foods.
3rd & 4th Month (May & June): Adding Mango
This entry is part follow up from last month, which ended up being a bit hectic since I left for Germany and was gone for a whole month. Positive finding: My Rumtopf is doing fine even without any babysitting at all for a month! Important note: If you do decide to have someone babysit while you're off to wherever you're off to, do not physically move your Rumtopf. A friend once reported that her Rumtopf was ruined by her moving to a new home. Shaking up the fruit too much and possibly exposing it to air in the process is no good. You're better off just leaving it put where it is. Nothing should happen to it. Last month I added some fresh, peeled, cored and chopped up mango to my Rumtopf (and some more blackberries). It was kind of an odd month for produce. Apricots and plums were nowhere to be found, but they're available aplenty right now. So if you don't want to add any kinds of tropical notes to your Rumtopf, go ahead and add the plums and/or apricots! It's what I will be adding in the next couple of weeks! I would also like to note that I did not add any rum or sugar when I added my fruit last month. During the first month when I added strawberries, I ended up adding 2 bottles of STROH because my fruit was swimming, so now I am just attempting to even the ratios back out with more fruit. 🙂 As you can tell, making Rumtopf isn't complete science. What's always a big question mark is how much of the liquid from the fruit will end up in the rum to dilute the alcohol content. You do not want for it to get so low that your Rumtopf is fermenting. If you're using STROH like me, you don't have much to worry about since it's super high in alcohol at 160 proof (traditional Rumtopf uses a rum with roughly 120 proof). You will know that you're in trouble when your Rumtopf starts to bubble up. The solution? Add more STROH to stop the fermentation. Now get to Rumtopfing! I'd love it if you left me a comment here or on my Instagram or Facebook accounts!
5th Month (July): Added Apricots
Just for fun, I thought I'd update you with a quick video! I added apricots and no extra rum and sugar this month. I set an age restriction on the video... because it shows alcohol. You'll have the click the link to watch it on YouTube. I hope you love it and leave me a comment! What are you adding to your Rumtopf this month??
Scroll on down for the recipe, now in printable version.
Spiced Rumtopf Version
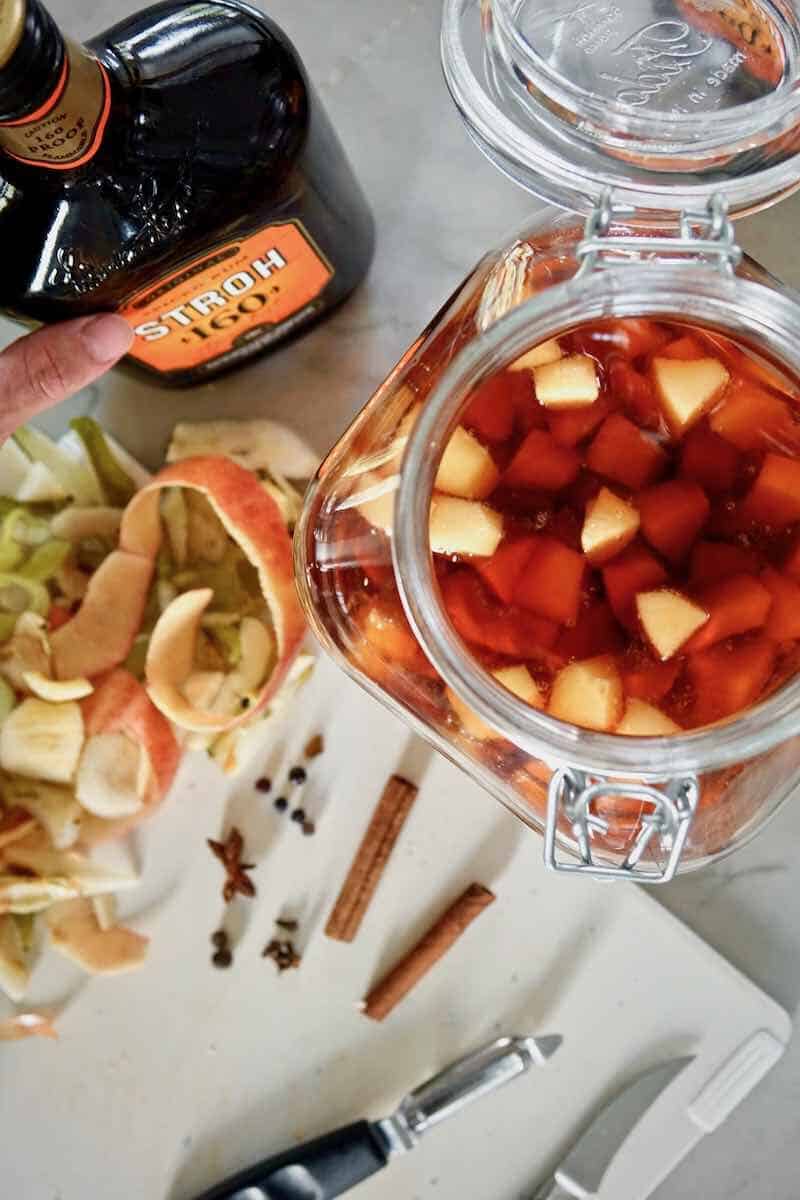
Guess what? There is a quick way to make a smaller version of Rumtopf that's perfect for the holidays! You can get started on it NOW and it will be ready to enjoy in just a couple of weeks! To make a Spiced Rumtopf, I followed the "Consecutive Feedings" portion of my recipe and used peeled, cored, and bite-sized cut pears and apples, then drenched it in a mixture of spiced STROH rum, sugar and apple cider (proportions described in the recipe). I also added some whole spices in the mix because Christmas season. For the spices, I used cinnamon sticks, cloves, star anise, allspice and juniper berries. You can add whichever spices you have handy or would like to use! I used whole spices, then slightly crushed the latter two with the flat side of a knife to help release those intense aromas. This will now infuse for a couple of weeks and we'll use it poured with sparkling wine at our Christmas party. I already can't wait! In the mean time, check out my Rumtopf Scones and Rumtopf Ice Cream recipes! So good!
Scroll down for the recipe, now in a printable version.
Rumtopf Essentials
Subscribe to stay in the Loop
The first step is scary and gets things started. After that is when the fun starts if you ask me! You could even split off your Rumtopf and make a couple of variations of it. Make sure to subscribe to my blog now, so you're not missing out when I keep adding to my Rumtopf diary!

Rumtopf: German Rumpot Recipe
Equipment
Ingredients
Instructions
Get Everything Ready For Rumtopf
- To start, make sure you're using an appropriate container like the glass jar I am using. Ideally it has a tight fitting lid, so a large canning jar works great. If reusing an old canning jar, make sure you clean it out well and replace the rubber gasket before filling it.
- Traditionally Rumtopf is prepared in a Rumtopf specific crock that has a wide lid and weights to put on the fruit to keep it from rising. While the glass jar I am using does not come with weights, there are alternative ways to keep the fruit from rising to the surface and spoiling, such as covering the surface in plactic wrap. While I don't love the idea of having plastic swim in my Rumtopf, this seems to be the best way to keep the fruit from rising. You could also fill a plastic bag with water and lay that on top. I'd probably use a thicker freezer bag with a double zip lock just to give me peace of mind that the bag won't leak. You could also try fitting small ceramic plates through the opening of the jar and layering them to cover all of the fruit. I haven't found plates small enough, but I will keep looking and will let you know if I find a good solution.
- Once you've gathered a good container to store your Rumtopf, you will need to figure out a good place to store the container in, preferably a dark room that's also cooler if possible. You do not want your Rumtopf to start fermenting. The goal is simply to infuse the rum with the fruit and the fruit with the rum.
The First Rumtopf Feeding
- I recommend starting with strawberries. The strawberries need to be flawless, hulled or greens removed and if they are on the larger side, they should be halved, possibly even quartered. Smaller strawberries can be left whole. Combine equal weight of strawberries and sugar (500 grams or 18 ounces each), gently stir to cover all of the fruit in the sugar and then allow to macerate in the fridge overnight to allow some of the juices to extract from the berries before adding it to your Rumtopf crock.
- Add the macerated fruit to your Rumtopf and cover in rum leaving about 1 inch or 2 cm of head space above the fruit. For the jar I used, I emptied a 750 ml bottle of STROH rum into the jar, so you'll want to stock up on it in case you need more!
- Now cover the surface in plastic wrap and transfer the jar to a dark room or area that's also cooler if possible. If you don't have a dark room, you could keep the jar in a cabinet or closet or throw a dark towel or blanket over it to cover it up.
Consecutive Rumtopf Feedings
- Now gradually you will add more macerated fruit and rum as the fruit is harvested month after month. Traditionally, locally available fruit is used, but you could also use more exotic fruits such as mango or pineapple, always making sure you're adding them at peak ripeness and sorting out any fruit that is bruised or compromised in any way. You will also want to peel fruit with thicker skins (apricot, peaches, pears, apples, plums), remove stems and seeds and cut the fruit into bite sized pieces.
- After the first 'feeding,' the fruit will only be macerated with half the amount of sugar (e.g. 500 grams of blackberries with 250 grams of sugar). Rum will always need to be added to cover 2 cm/ 1 inch above the fruit, but after the first 'feeding,' I will mix the rum with fresh fruit juice in a ratio of 3 to 1 to bring down the overall alcohol content. Please read my blog post for more info on this; I will keep it updated with what I am adding when and new photos!
Keep It Covered
- Remember to keep covering the surface in your Rumtopf and always reseal the jar with a tight-fitting lid. I would replace the plastic wrap with fresh wrap every time you feed your Rumtopf. Also check my blog post for any troubleshooting tips and you can always send a message or leave a comment with any suggestions, ideas or questions.
Nutrition
I received compensation from Niche Import Co. in exchange for writing this post. Although this post is sponsored, all opinions, thoughts and recipes are my own. This post contains affiliate links, which means that I may be compensated if you click certain links.


Erin
Maybe you could add fermentation weights? (Like these https://www.amazon.com/4-Pack-Fermentation-Glass-Weights-Handle/dp/B076V66FZ4)
dirndlkitchen
Yes, you could! I also like using my Weck glass lids for this reason. Anything that you can fit through the opening of the Rumtopf that has a bit of weight.
Donna
I haven't tried this, but would it work to put pie crust weights (those hard balls that weigh down a pie crust when you bake it) into a plastic baggie to hold down the fruit?
dirndlkitchen
Yes, that should work great for keeping the Rumptopf fruit from rising above the surface. Let me know once you try it, too. You can of course also buy fermentation weights online.